


Walls can accumulate small holes from screws and nails over time. Whether it’s from taking down your massive entertainment center or from hanging pictures and shelves, holes in walls tend to happen eventually, making your wall look like it has been attacked by a very determined woodpecker.
These little punctures in your walls don’t have to be a permanent reminder of your decoration. Learning how to patch screw holes in drywall is relatively easy; however, most people make this relatively small home repair project way more complicated than it needs to be. Fortunately for homeowners, you can make screw holes completely disappear in a day, you just need the right materials and guidance.
Understanding the Difference between Screw Holes and Nail Holes
Before we dive into the step-by-step guide on how to repair your damaged drywall, it’s important to understand what you’re really dealing with. While the repair techniques for both are quite similar, understanding the type of hole you’re dealing with ensures you choose the appropriate materials and methods.
While nail holes tend to be clean and small, screw holes are larger and often cause a bit more damage around the edges. They typically have threads that can tear the paper facing of drywall. This is why the technique for patching screw holes is slightly different from how to patch nail holes in drywall.
A lot of people make DIY repair attempts where they just smear a speckle over a screw hole and call it a day, only to have the repair stick out like a sore thumb once the paint has dried. The key to filling a hole properly is understanding that you have to recreate a smooth and uniform surface that matches the surrounding texture of the wall.
Tools and Materials You Will Need
The most common mistake people make when attempting to fix a hole in the drywall is trying to use whatever random supplies they have. Even though you don’t need a ton of special tools for this easy DIY home project, having the right tools and materials can make the difference between results that look ‘amateur’ and ones that look ‘professional. These are the materials you should have:
- Lightweight spackle or joint compound
- Putty knife (preferably a couple of different sizes)
- Fine-grit sandpaper or sanding sponge
- Primer
- Paint that matches your wall color
- Damp cloth
The putty knife you choose matters more than most people realize and this is why it’s important to have different sizes of knives. It’s also important to note that if your knife is too stiff, you’ll have trouble getting a smoother application and if it’s too wide, you’ll make a mess trying to work in tight spaces.
Keeping a small paintbrush handy for touch-up painting will also help you achieve smooth results because using a big brush or a roller might leave texture marks around the patch you’ve just worked an hour to make invisible.

Step-by-Step Guide to Patch Screw Holes in Drywall
Now let's get into the steps of how to actually patch screw holes in drywall properly.
Step 1: Clean the Area
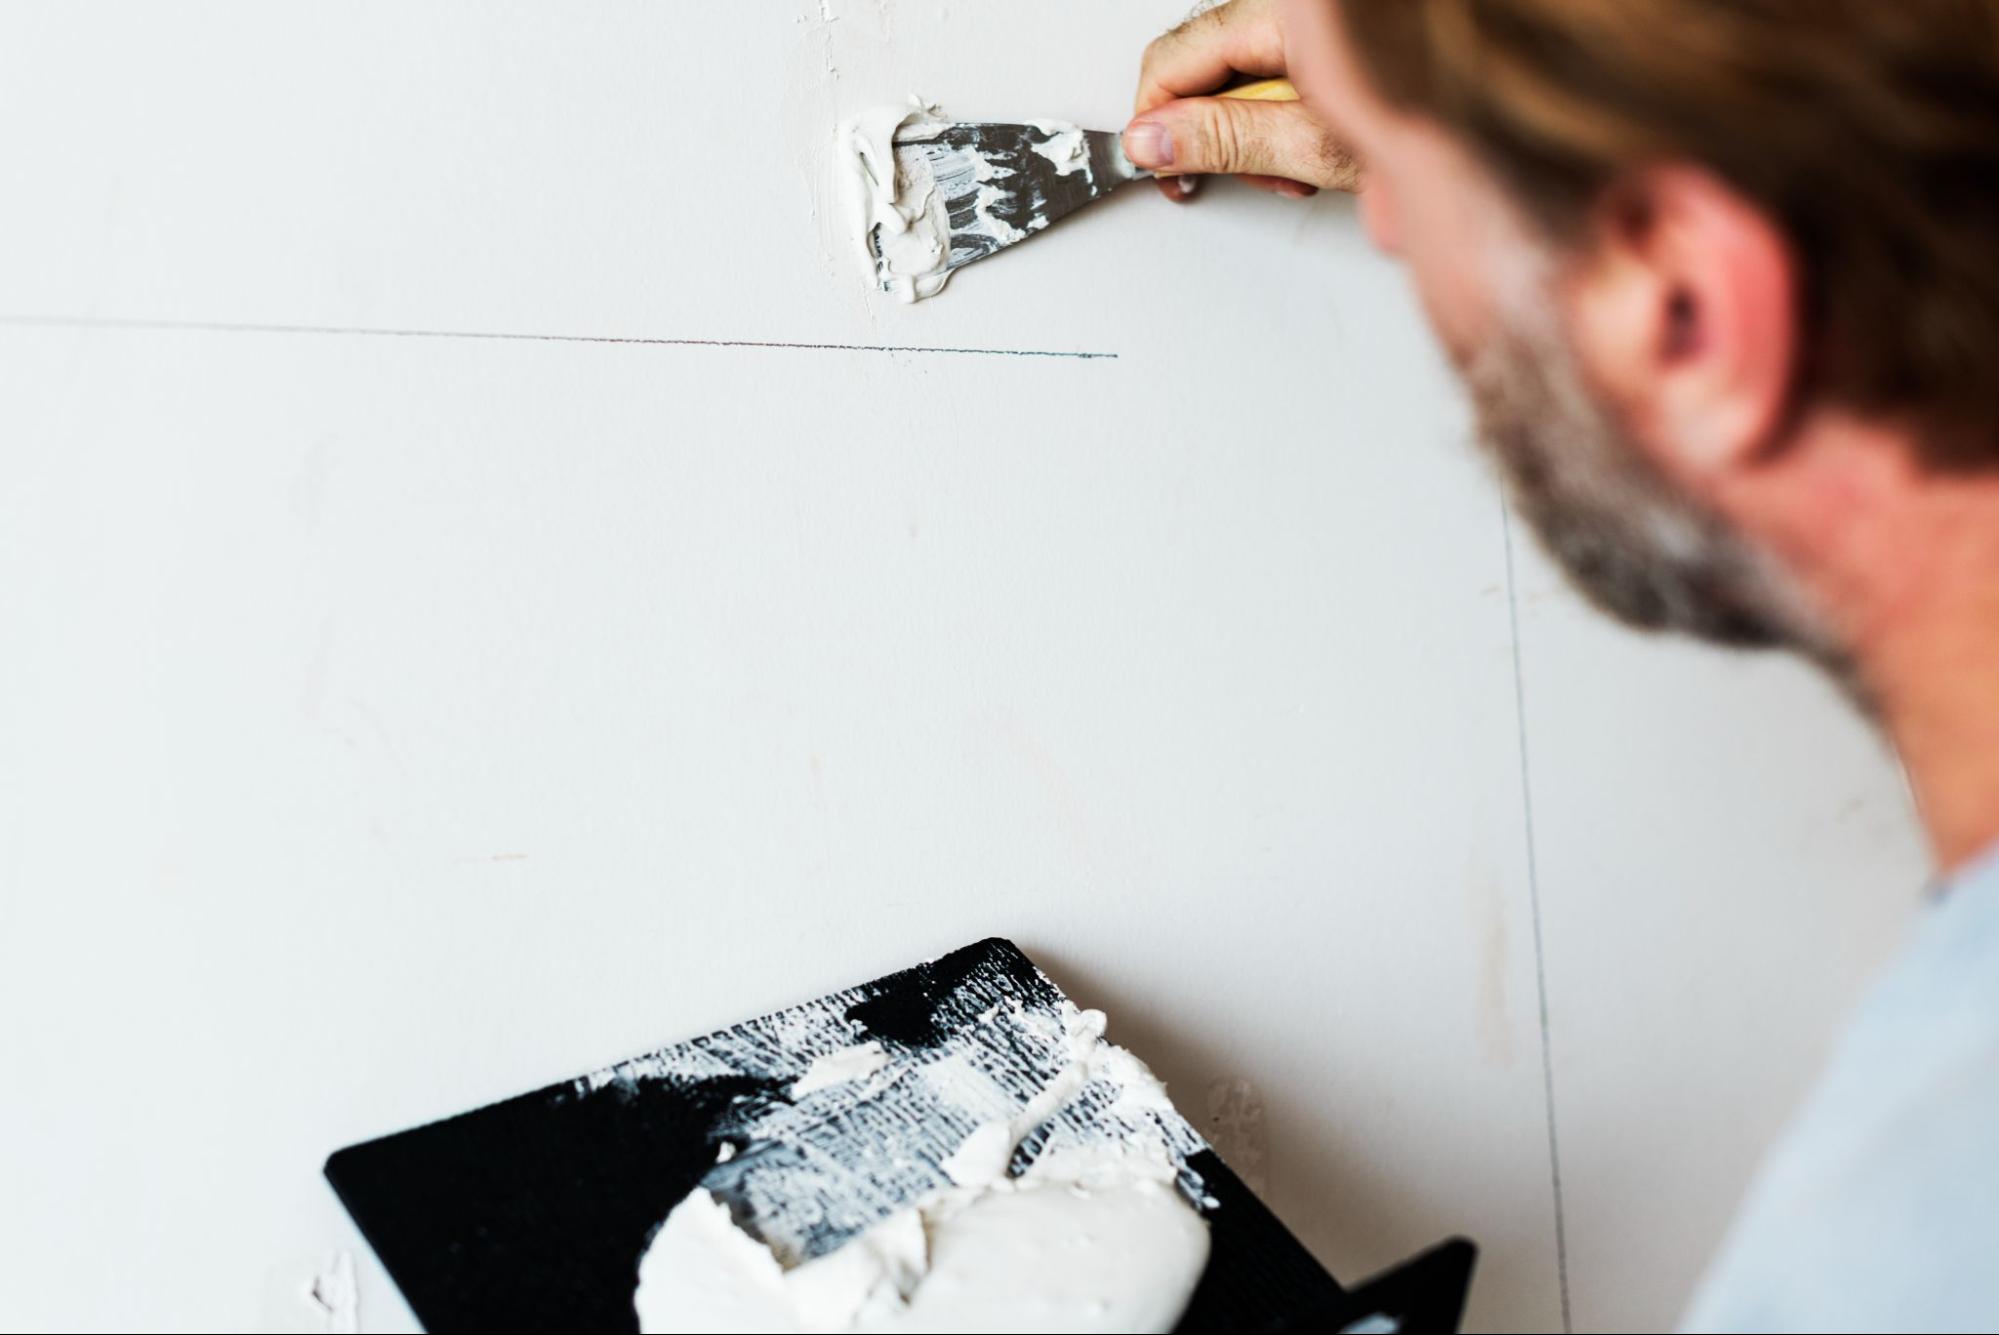
Inspect the hole and clean out any loose debris from the hole. Sometimes there are jagged edges or loose drywall paper around the screw hole that need to come out before you start filling. Use a putty knife to gently trim and scrape away the edges. Make sure you have removed all dust, dirt, and any leftover debris so your spackle sticks properly.
Step 2: Fill the Area
Next comes the filling stage and this is where most people go wrong. Even though it may seem easier to fill a big chunk of spackle into the hole and try to get it filled in one go, but, this can mess it up. Instead, slightly overfill the hole with your first application and then use your putty knife to press the spackle firmly. Then scrape away the excess with the knife, leaving just enough material to fill the depression.
Step 3: Let the Area Dry
Let the application dry completely. No matter how tempted you are to get the final results and finish the process, you can’t rush this step. Most spackling takes 1 to 2 hours to dry but it depends on the humidity and temperature. It’s best to follow the manufacturer’s instructions for the spackle compound you’re using. If you paint over too soon or sand the area, the filling can look uneven and mess up your entire repair.
Step 4: Sand the Area
Sanding is the make or break step of screw hole repair so make sure you do this step with utmost patience and care. Once your spackle is dry, use fine-grit sandpaper for sanding. Use light and circular motions rather than aggressively scrubbing back and forth. You want to gradually blend the edges of your repair into the surrounding wall surface so that it’s invisible.
Step 5: Prime and Paint the Area
Primer helps the paint adhere better so it’s always best to prime before painting. Even perfectly patched and sanded holes can show through your paint if you skip priming or use the wrong painting technique. Use a small brush to paint and paint multiple thin coats rather than going with one thick application. Make sure you match the color of the surrounding wall and blend the paint seamlessly into the existing paint so your repaired screw hole looks completely disappeared.
Common Mistakes to Avoid
Even though drywall repairs are simple, some of the common mistakes that can lead to less-than-perfect results and that you should avoid include:
- Skipping the primer: This can result in uneven paint coverage and a noticeable patch.
- Over-sanding the area: This can create a dip in the wall, making the patch obvious.
- Painting too soon: Always allow the compound to dry completely before sanding or painting.
- Using the wrong spackle compound: Lightweight spackles are perfect for small holes, while larger repairs may require a joint compound or even a setting-type compound.
When to Call a Professional
While most drywall repairs can be done DIY, there are certain situations where it’s better to call a professional. Call a professional when:
- There’s water damage around the screw holes causing stains or mold.
- There are multiple large holes across the entire room.
- The surrounding wall has textured paint.
- The holes are larger than 2 inches and require backing support.

If you find yourself patching several screw or nail holes or noticing other drywall damages that require repair, it might be time to think bigger. Small DIY repairs can be a great entry point into more significant home renovation projects. From repainting the entire house to changing baseboards to or even remodeling an entire room to give it a new look, improving your wall surfaces can elevate the whole space.
These upgrades not only help improve the aesthetics and ambiance but can also boost your home’s value.
Learning how to patch screw holes in drywall is a handy skill that every homeowner should learn. It's one of those minor home repair projects that can make a major difference in how your space feels. With a bit of time, the right tools, and some attention to detail, you can restore your walls to their original smoothness in less than a day.
However, if drywall repair isn't your thing or you’re planning a more extensive home remodel, our experts are just a phone call away. Our team offers high-quality construction, renovation, and remodeling services designed to help your home look its best, whether it's a small patch job or a full-scale transformation.

.png)
.png)
